Let me tell you something straight up: packing a rucksack isn’t as simple as stuffing everything in and hoping for the best. Trust me, I’ve learned this the hard way. Whether you’re heading out for a tough ruck challenge, a multi-day hike, or just a casual day on the trails, how you pack your rucksack can make or break your experience.
I’ve seen it all—gear digging into someone’s back, unbalanced loads that make you feel like a wobbling toddler, and, worst of all, the sheer frustration of digging through your pack for something you know you packed, only to find it buried at the bottom. Sound familiar? That’s why learning the art of packing is a game-changer.
In this guide, I’m going to walk you through exactly how to pack your rucksack for maximum comfort, efficiency, and ease of access.

Choosing the Right Rucksack
Before we dive into packing, let’s talk about the foundation of it all—your rucksack. Picking the right one is like choosing the right pair of boots: get it wrong, and you’ll feel every mile. Trust me, I’ve seen people struggle through a ruck because they underestimated how important the right rucksack is. Don’t be that person.
Size Matters
The size of your rucksack depends on what you’re planning to do. Heading out for a quick 3-mile ruck around town? A smaller 20-30L assault pack will do the trick. Prepping for a multi-day hike or heavy-duty ruck training? Go for something in the 40-60L range. Anything bigger than that, and you might be carrying a small closet—great if you’re thru-hiking, but overkill for most rucking situations.
Features to Look For
Let’s get into the details. Not all rucksacks are created equal, and some features are absolute lifesavers:
- Padded Shoulder Straps: You’re going to thank yourself after mile 5. Cheap straps will dig into your shoulders and make you miserable.
- Hip Belt: A must-have for heavier loads. The hip belt takes weight off your shoulders and transfers it to your hips, where your body is stronger.
- Ventilated Back Panel: If you’re rucking in warmer weather, this keeps your back from turning into a swamp. Trust me, no one enjoys a sweat-drenched shirt.
- Multiple Compartments: Organization is key, and having dedicated pockets for your gear makes packing (and finding stuff later) so much easier.
- Durability: Look for rugged materials like Cordura or ballistic nylon. Your rucksack needs to handle rough treatment and still come back for more.
Fit Is Everything
You could have the fanciest rucksack in the world, but if it doesn’t fit you properly, it’s worthless. A good ruck should sit snug against your back with the weight distributed evenly. Pay attention to these points:
- Adjust the shoulder straps so the ruck doesn’t sag.
- Tighten the hip belt so most of the weight sits on your hips, not your shoulders.
- Use the chest strap to stabilize the load.
Tip: Test Before You Commit
Take your potential rucksack for a test run before committing. Load it up with some weight (20-30 pounds is a good start) and walk around. Does it feel comfortable? Are there any pressure points? Does the pack stay balanced? If something feels off now, it’ll only get worse on a long ruck.

The Golden Rules of Packing a Rucksack
Now that you’ve got the right rucksack, let’s talk about how to pack it. A properly packed rucksack makes a world of difference in your comfort and efficiency—something I’ve learned after countless miles under heavy loads. Follow these golden rules, and you’ll be rucking like a pro in no time.
1. Keep the Center of Gravity Close to Your Back
Here’s the deal: the closer the heaviest items are to your back, the more stable you’ll feel. Think of your pack as an extension of your body. If you toss the heavy stuff on the bottom or too far out, it’ll pull you backward, making every step harder. Instead, pack heavy items—like water, food, or weights—right in the bottom or middle of your ruck and close to your spine. This keeps the load balanced and saves your energy.
2. Balance the Weight
Speaking of balance, uneven weight distribution is a rookie mistake you’ll want to avoid. If one side of your ruck is significantly heavier than the other, you’ll end up leaning or compensating with your body, which can lead to back pain, fatigue, or even injury over time. Distribute weight evenly on both sides of the ruck. It’s worth taking a few minutes to adjust things if you notice one side feeling off.
3. Accessibility Is Key
Picture this: you’re mid-ruck, thirsty, and need a drink. You dig around in your pack, pulling out a jacket, a first aid kit, and three random items before finally finding your water bottle. Frustrating, right? Avoid this by packing essentials—like water, snacks, a first aid kit, or a map—in easy-to-reach pockets or on the top layer of your rucksack. Save yourself the headache.
4. Fill Gaps for Stability
When packing, aim for a tight, stable load. Empty spaces let your gear shift around, throwing off your balance and making noise. Use smaller items, like socks or a rain jacket, to fill gaps and stabilize the load. Think of it like building a solid puzzle that doesn’t shift when you move.
5. Protect Your Gear from the Elements
Even if the forecast is sunny, you should assume the weather will turn on you at some point—it’s just how things go in the outdoors. Line the inside of your ruck with a trash bag or invest in waterproof dry bags to keep your gear dry. Bonus points if you have a rucksack with a built-in rain cover. It’s better to be over-prepared than to end up with soaked gear.

Understanding the Weight Zones
Alright, now we’re getting into the nitty-gritty—where everything goes in your rucksack. The way you distribute weight in your pack can make a night-and-day difference in how comfortable you feel on the trail. Let me walk you through the concept of weight zones.
The Three Weight Zones
Here’s how to think about your pack:
- Bottom Zone (Bulky Items)
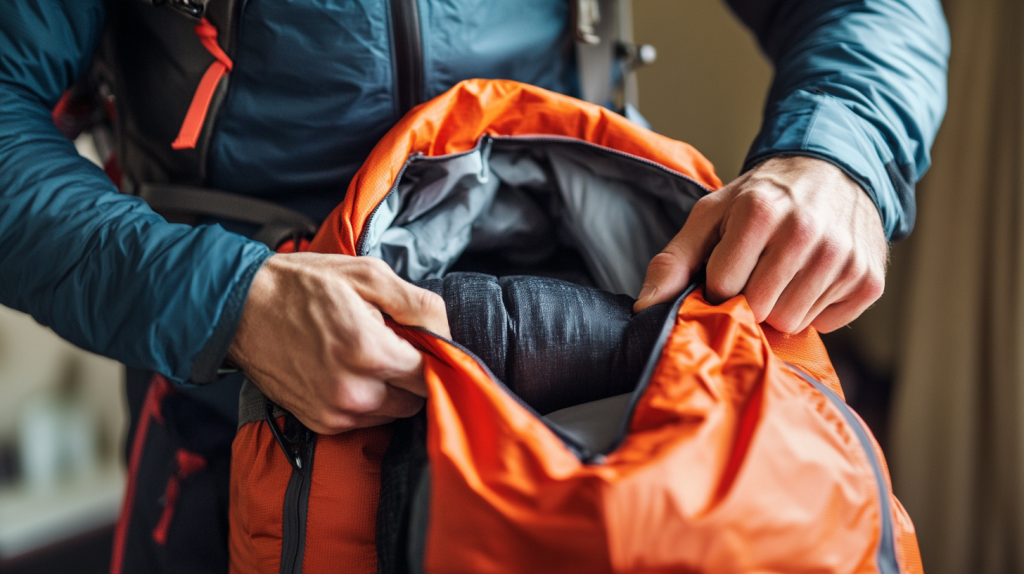
The bottom of your pack is where you stash bulky items. These are things you won’t need to access often but take up space—like a sleeping bag, a puffy jacket, or extra clothes. These items create a stable base without adding unnecessary weight down low.- Tip: Use a compression sack for your sleeping bag or clothes to save space and keep them organized.
- Middle Zone (Heavy and Centered)
This is the sweet spot, the core of your pack, and where all the heavy stuff should live. Why? Because when heavy items are close to your back and centered, they feel like they’re part of your body. It’s easier on your shoulders and keeps you balanced.- Examples: water reservoir, food, stove, and any weights you’re carrying for training.
- Tip: Pack heavy items vertically rather than horizontally—this keeps the weight distributed along your spine instead of pulling your back in weird directions.
- Top Zone (Medium-Weight and Frequently Used)
The top of your pack is for medium-weight items that you might need to grab quickly. Think rain gear, a lightweight jacket, or your navigation tools (map, compass, GPS). This zone is all about convenience and not weighing down your shoulders too much.- Tip: Keep things you’ll need on the move—like a snack or headlamp—in an outer pocket or the brain (the lid compartment) of your pack for quick access.
Side and External Pockets
Don’t overlook the pockets! These are perfect for smaller essentials you’ll want within arm’s reach:
- Side Pockets: Water bottles, trekking poles, or fuel bottles.
- Front/Outer Pocket: A first-aid kit, gloves, or snacks.
- Hip Belt Pockets: These are great for quick-grab items like energy gels, a phone, or keys.
- MOLLE: Securely attach accessories like flashlights, multi-tools, and more to the outside of the bag.

Final Adjustments and Fit
So, you’ve packed your rucksack—everything is in its proper zone, and it looks good to go. But before you hit the trail or start your ruck march, there’s one last step that can make all the difference: dialing in the fit.
1. Start with the Hip Belt
The hip belt is the unsung hero of your rucksack—it’s designed to take most of the load off your shoulders and distribute it to your hips, where your body is strongest. Here’s how to adjust it:
- Position It Correctly: The padded part of the belt should sit snugly on the top of your hip bones, not above or below them.
- Tighten It Securely: Pull the straps until the belt feels snug but not restrictive. It should stay in place as you walk without sliding around.
2. Adjust the Shoulder Straps
Once your hip belt is set, it’s time to move on to the shoulder straps. These should stabilize the pack without carrying too much weight (that’s the hip belt’s job).
- Pull Them Tight: Tighten the shoulder straps so the ruck hugs your back but doesn’t feel like it’s digging into your shoulders.
- Check the Fit: The straps should contour comfortably around your shoulders, with no big gaps.
3. Use the Load Lifters
If your rucksack has load lifters (those little straps running from the top of the shoulder straps to the pack), now’s the time to use them. These help pull the weight of the pack closer to your body, improving balance and reducing strain.
- Tighten Slightly: Pull the load lifters until the top of the pack tilts slightly toward your shoulders.
4. Fasten the Sternum Strap
The sternum strap runs across your chest and helps stabilize the shoulder straps, keeping them from sliding outward as you move.
- Adjust for Comfort: Slide the sternum strap up or down until it’s at a comfortable height across your chest, then buckle it.
- Tighten Just Enough: Pull the strap snug but not tight—it’s there for stability, not compression.
5. Walk and Adjust
Now that everything’s strapped in place, it’s time for the ultimate test—walking with the pack. Put it on, take a few steps, and pay attention to how it feels.
- Is the Weight Balanced?: If the pack feels lopsided, adjust the contents or loosen/tighten specific straps.
- Any Hot Spots?: If you feel rubbing or pressure points, shift the straps or padding to alleviate discomfort.
- Too Loose?: A pack that bounces or shifts needs tighter straps or a better balance of weight inside.
Conclusion: Mastering the Art of Rucksack Packing
Packing a rucksack might seem like a small detail, but as any seasoned rucker will tell you, it’s a game-changer. By understanding how to distribute weight, packing for accessibility, and fine-tuning the fit, you’ll turn your rucksack into a tool that works with you, not against you.
Remember, this isn’t something you’ll master overnight—it’s a skill that improves with every ruck. The more you practice and experiment, the better you’ll get at finding the perfect system that works for you.


